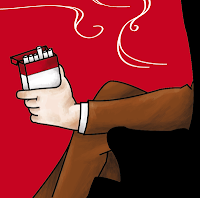
I then worked on the trace for my back cover in a different layer using the pen tool and tracing my sketch of the man in the chair from my sketchbook. I filled the chair in black and using some calligraphy artistic brushes I drew in the white smoke. I felt this was more effective for the smoke than using the pen tool as the curves didn't have any obvious anchor points in them. I also think that the lines blend better together as they have different thicknesses and the calligraphy brush doesn't have a set stroke.

Using the pen tool again I went in and filled in the base colours of the suit, hat and hand on a separate layer. In that same layer I used artistic paint brushes with a 0.25 pt size and between 20 - 50% opacity to start adding some details to the hand and the pack of cigarettes giving them some highlights and shadows. I continued shading like this with the same brushes for the hat and suit as well.
Now I'm going to add the blurb to the back cover. The first part of it will be written at the top in the red space which will be a quote from the book which is included in the blurb. For this i'll be simply using the text tool and typing it out in my typewriter font face. I want the rest of the blurb on the back of the chair but I want the text to follow the shape of the chair. To do this I duplicated the chair layer and labelled it 'chair blurb', I then selected the fill shape of the chair and click on the path of the chair with the type tool, this made a text box in the shape of my chair's outline so I just continued to type in the rest of the blurb, making the reviews at the bottom in a grey colour to separate it from the blurb itself.
This is the finished product.


No comments:
Post a Comment